Azure VM Scale Sets
- 4 minsINTRODUCTION
Azure provides a how-to guide for how to create a Virtual Machine Scale Set in their technical documentation here: Product Directory -> Azure -> Create / Manage a VM -> Create a scale set.
I was curious to see what this would look like, so I decided to set this up in my test lab and run through the process my self. I documented the steps below.
WHAT IS A VIRTUAL MACHINE SCALE SET?
Azure virtual machine scale sets automatically increase or decrease the number of load-balanced, identical VM instances in your environment in response to demand or a defined schedule. Virtual machine scale sets are ideal for scenarios that include compute workloads, big-data workload, and container workloads.
IMPORTANT TERMINOLOGY
- Horizontal Scaling is the proceess of adding or removing several virtual machines in a scale set.
- Vertical Scaling is the process of adding resources such as memory, CPU power, or disk space to VMs.
- Scheduled Calling, where you proactively schedule the scale set to deploy one or N number of additional instances to accomodate a spike in trrafic and the spike back down when eveything is back to normal.
- Autoscaling: Of the workload is variable and can't always be scheduled, you can use metric-based threshold scaling.
GOOD TO KNOW
- Low Priority Scaling Sets give you up to 80% off on price, but come at a trade off: no availability gaurantees. See here for more details.
HOW DOES A VIRTUAL MACHINE SCALE SET WORK?
Now that we know the key benefits and the important terminology, we are better prepared to dive into the Azure virtual machine scale set deployment process.
DEPLOYMENT PROCESS OVERVIEW
- Deploy the virtual machine scale set.
- Configure the virtual machine scale set.
- Test the virtual machine scale set.
- Configure the virtual machine scale set rules
TIME TO IMPLEMENT: 1 HOUR
DEPLOY THE VIRTUAL MACHINE SCALE SET
- Sign in to the Azure portal and open Azure Cloud Shell.
- In Cloud Shell, start the code editor and create a file named test-init.yaml.
- Add the following text to the file. This file contains configuration information to install nginx on the VMs in the scale set.
- Press Ctrl+S to save the file. Then press Ctrl+Q to close the code editor.
- Run the following command to create a new resource group named
scaleset-rg
for your scale set: - Run the following command to create the virtual machine scale set:
code cloud-init.yaml
#cloud-config
package_upgrade: true
packages:
  - nginx
write_files:
  - owner: www-data:www-data
  - path: /var/www/html/index.html
    content: |
        Hello world - Virtual Machine Scale Set
runcmd:
  - service nginx restart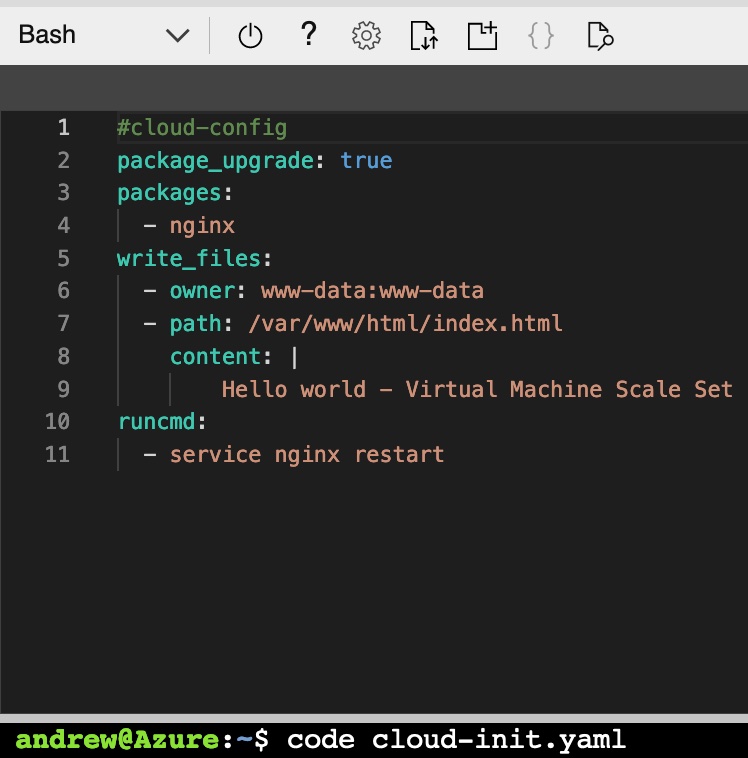
az group create \
  --location eastus \
  --name scaleset-rg

az vmss create \
  --resource-group scaleset-rg \
  --name webServerScaleSet \
  --image UbuntuLTS \
  --upgrade-policy-mode automatic \
  --custom-data cloud-init.yaml \
  --admin-username azureuser \
  --generate-ssh-keys
CONFIGURE THE VIRTUAL MACHINE SCALE SET
Since we are working with a web server, it is important to add a health probe at port 80, this way if the server doesn’t respond it is considered unavailable. As a result, the load balancer will not route traffic to this particular server.
- Run the following command to add a health probe to the load balancer:
- Run the following command to configure the load balancer to route HTTP traffic to intsances in the scale set:
az network lb probe create \
  --lb-name webServerScaleSetLB \
  --resource-group scaleset-rg \
  --name webServerHealth \
  --port 80 \
  --protocol Http \
  --path /
az network lb rule create \
  --resource-group scaleset-rg \
  --name webServerLoadBalancerRuleWeb \
  --lb-name webServerScaleSetLB \
  --probe-name webServerHealth \
  --backend-pool-name webServerScaleSetLBBEPool \
  --backend-port 80 \
  --frontend-ip-name loadBalancerFrontEnd \
  --frontend-port 80 \
  --protocol tcp
TEST THE VIRTUAL MACHINE SCALE SET
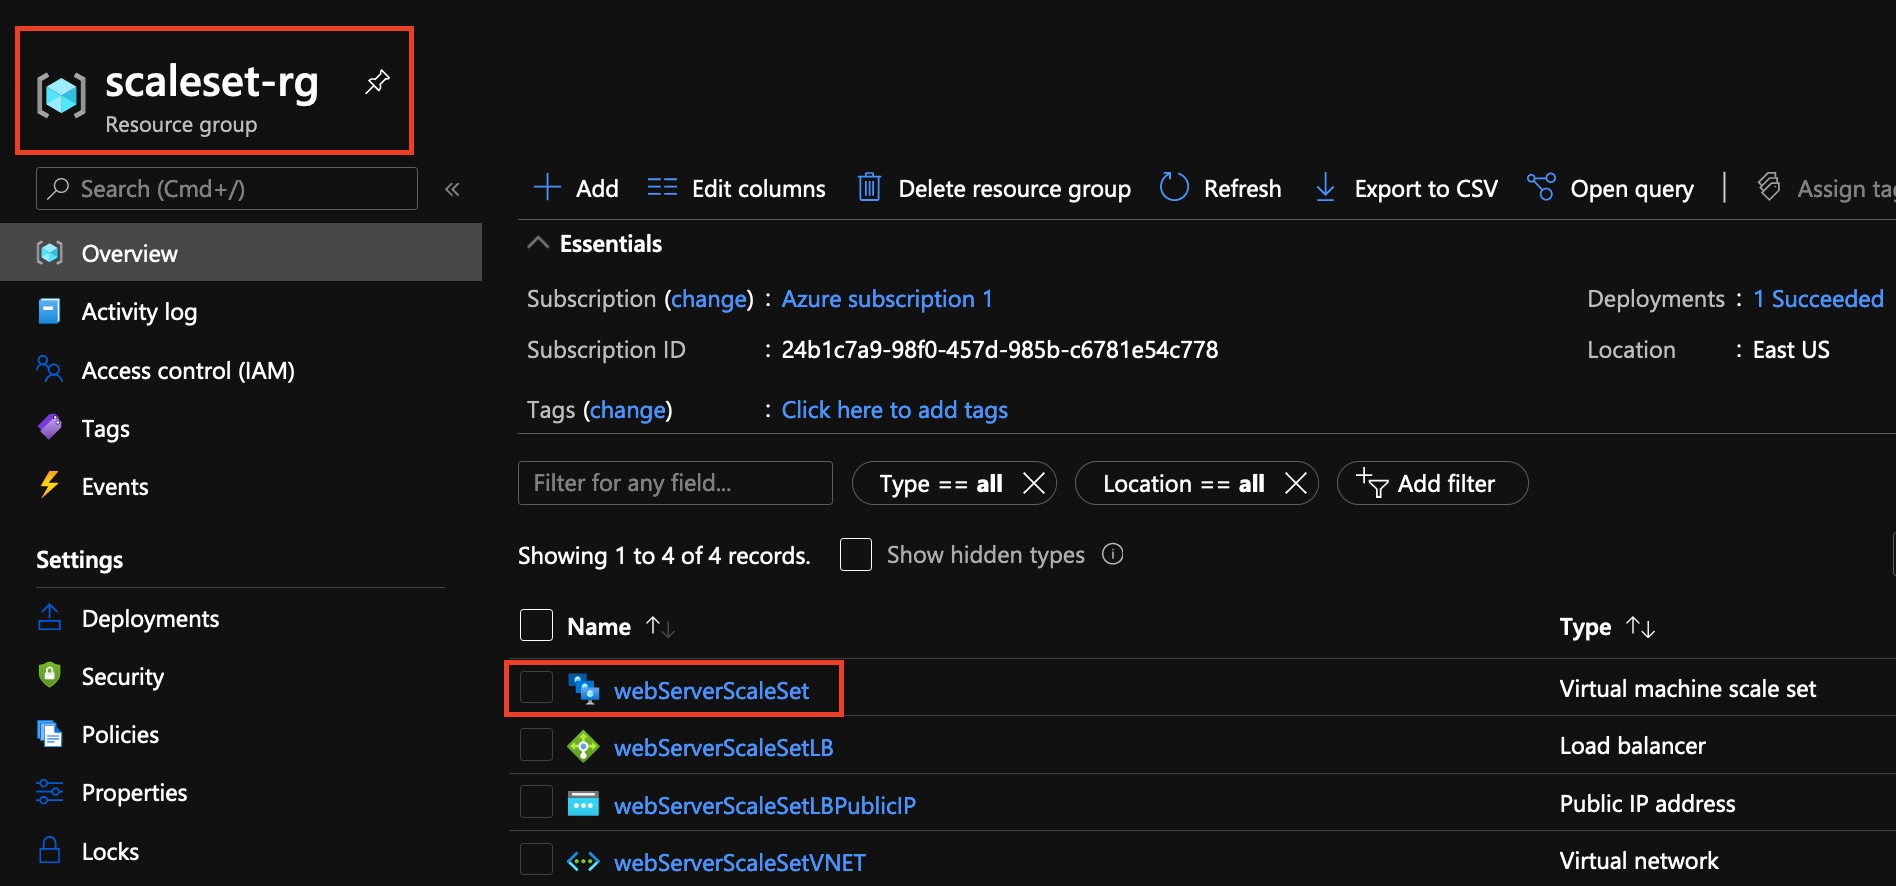
- In the Azure portal, go to Resources Groups -> scaleset-rg.
- Select the webServerScaleSet virtual machine scale set.
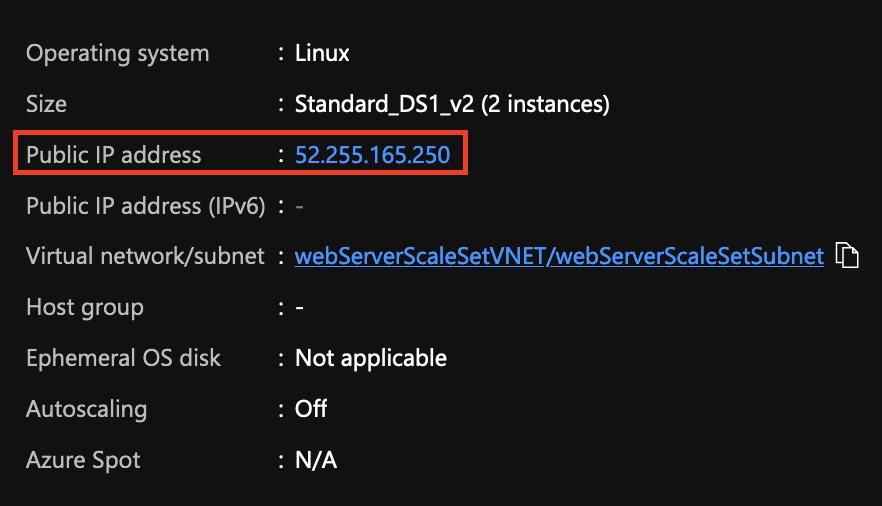
- Find the public IP of the the virtual machine scale set and browse to it.
- Ensure you see the configurations made beforehand in the cloud-init.yaml file.

CONFIGURE VIRTUAL MACHINE SCALE SET RULES
CREATE A SCALE-OUT RULE
- In the Azure portal, go to the page for the virtual machine scale set.
- On the virtual machine scale set page, under Settings, select Scaling.
- Select Custom autoscale.
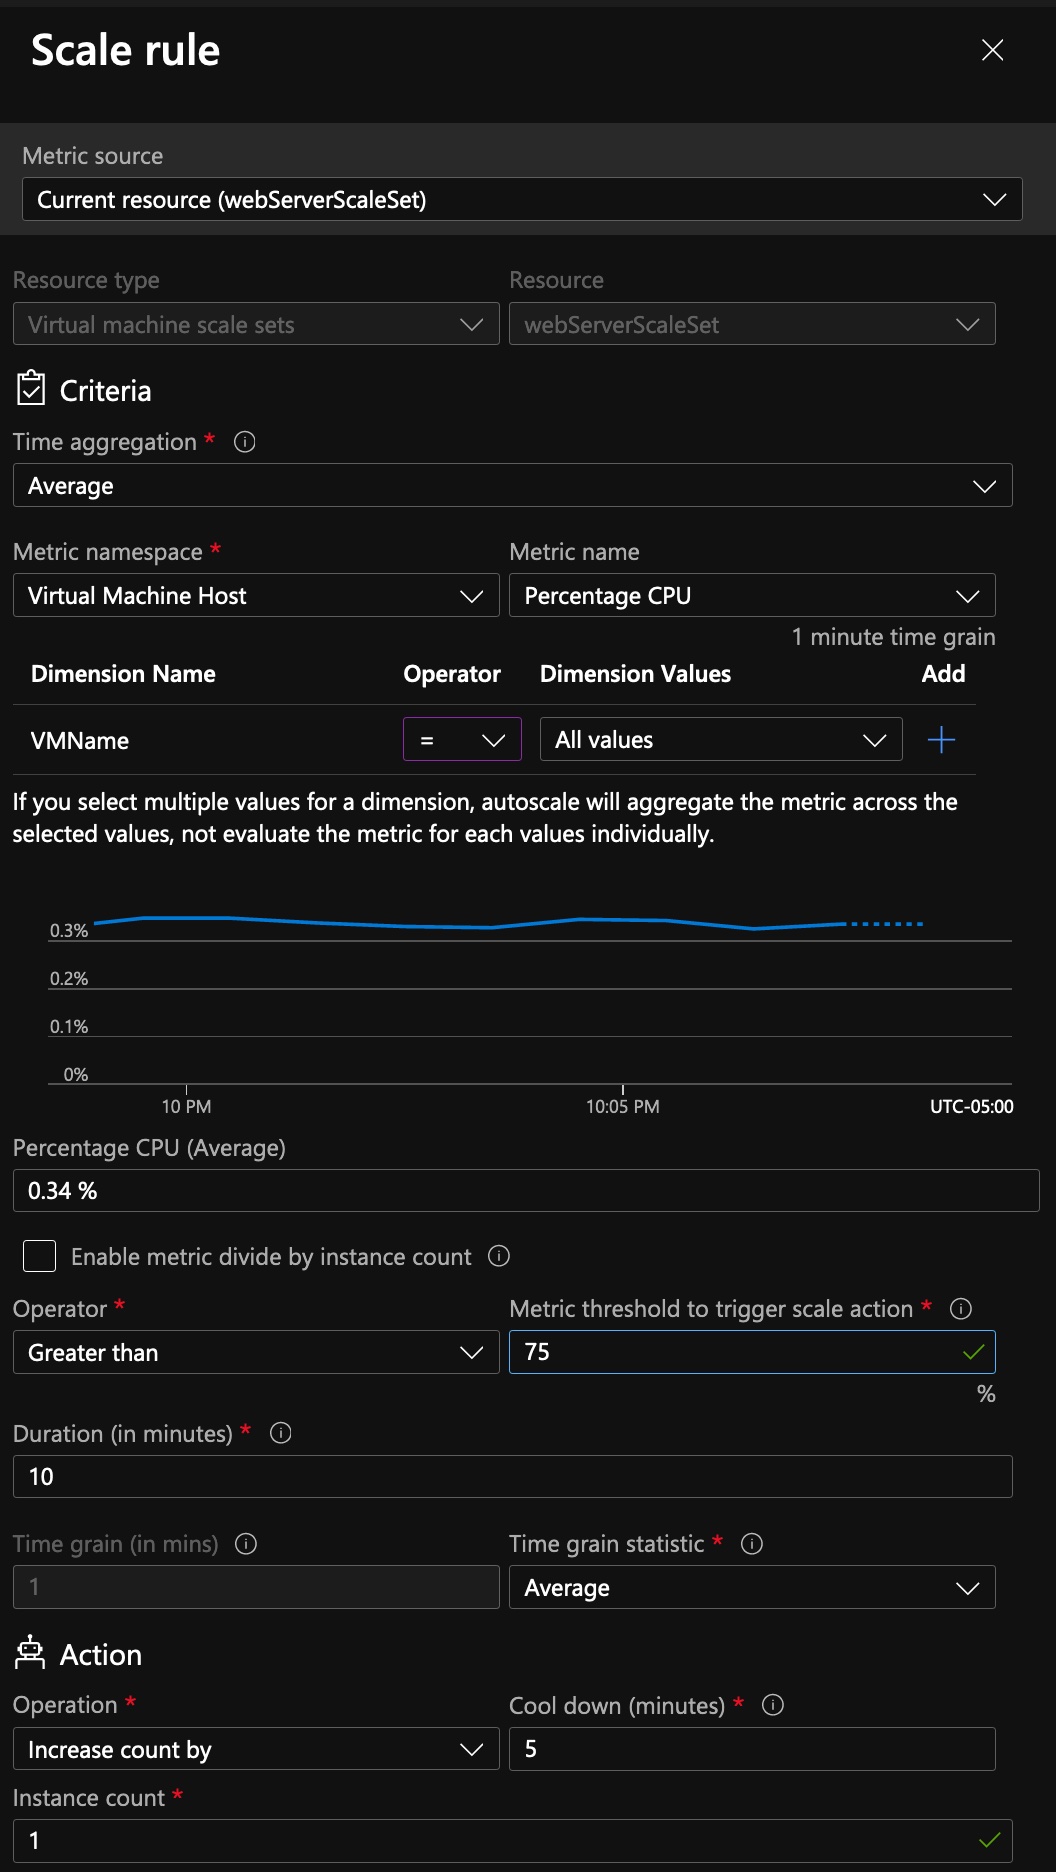
- In the Default scale rule, ensure that the Scale mode is set to Scale based on a metric. Then select + Add a rule.
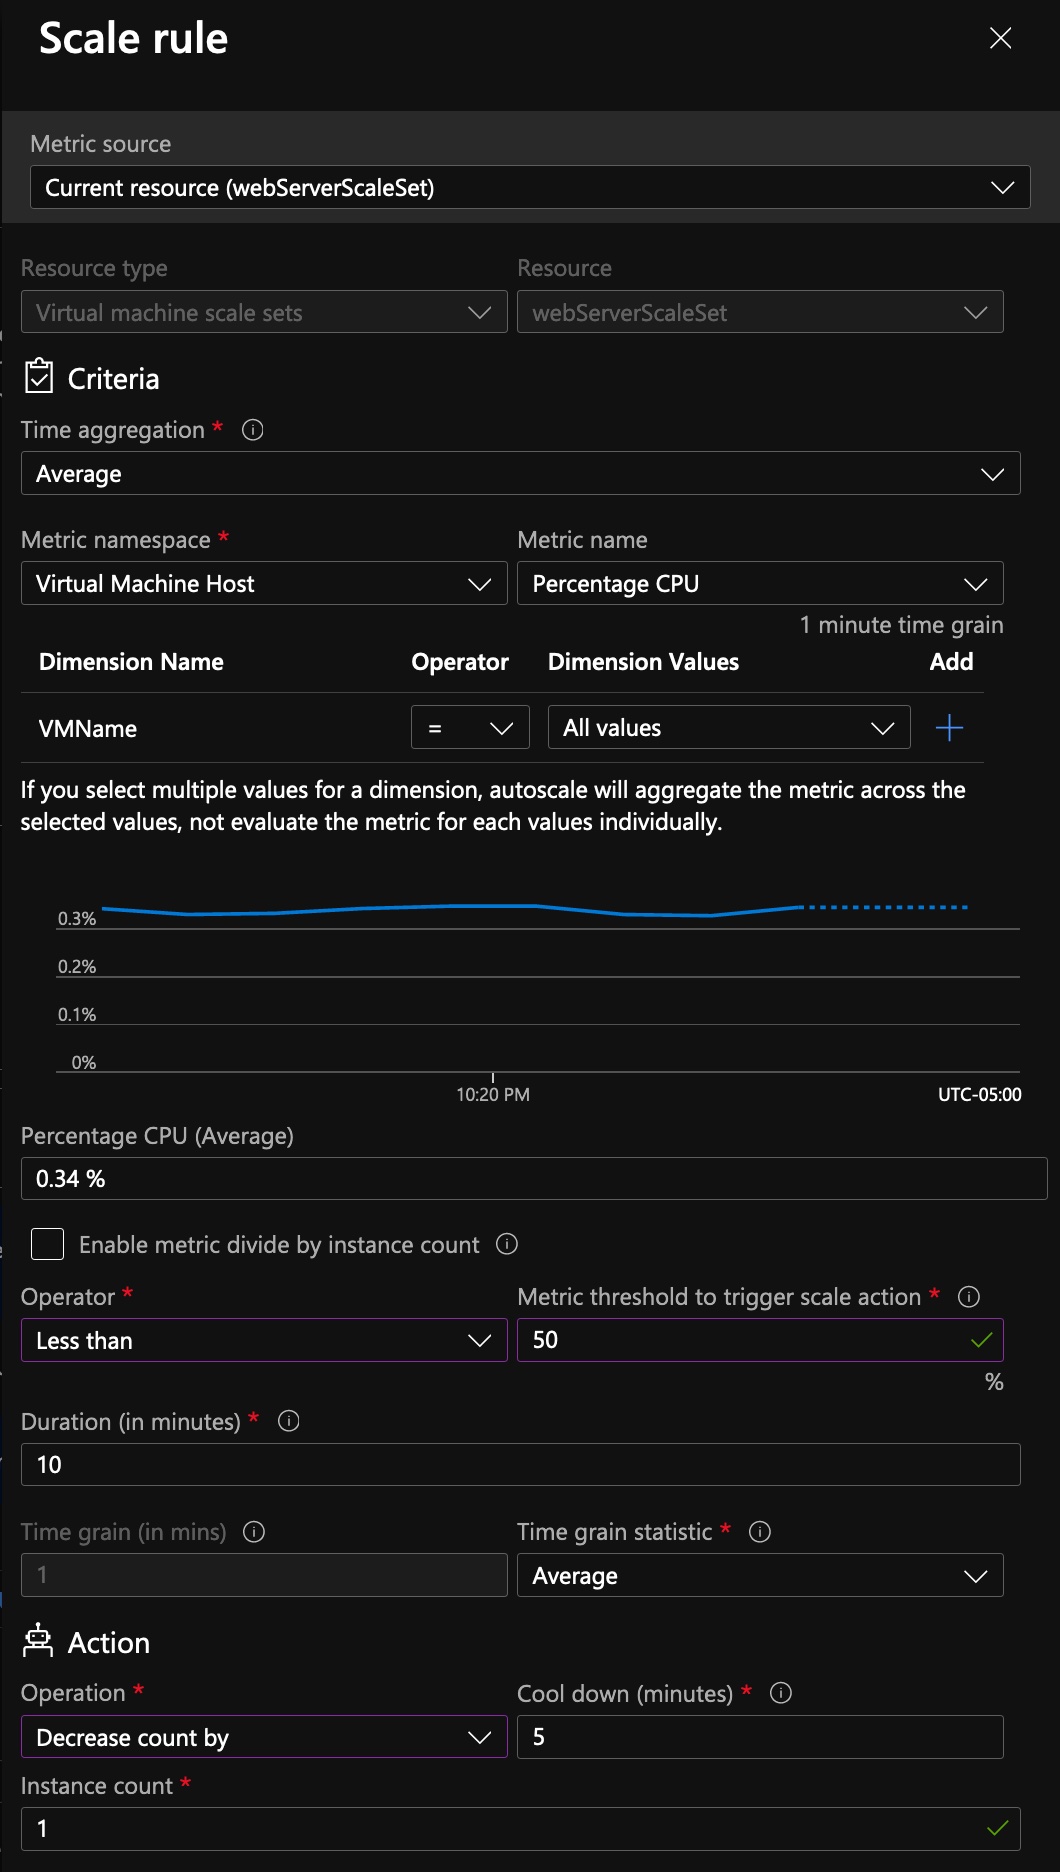
- On the Scale rule page, specify the following properties and values: Metric source, Time aggregation, Metric name, Time grain statistic, Operator, Threshold, Duration, Operation, Instance count, Cool down (minutes), then select Add.
CREATE A SCALE-IN RULE
- In the Default scale rule, select + Add a rule.
- On the Scale rule page, specify the following properties and values: Metric source, Time aggregation, Metric name, Time grain statistic, Operator, Threshold, Duration, Operation, Instance count, Cool down (minutes), then select Add.
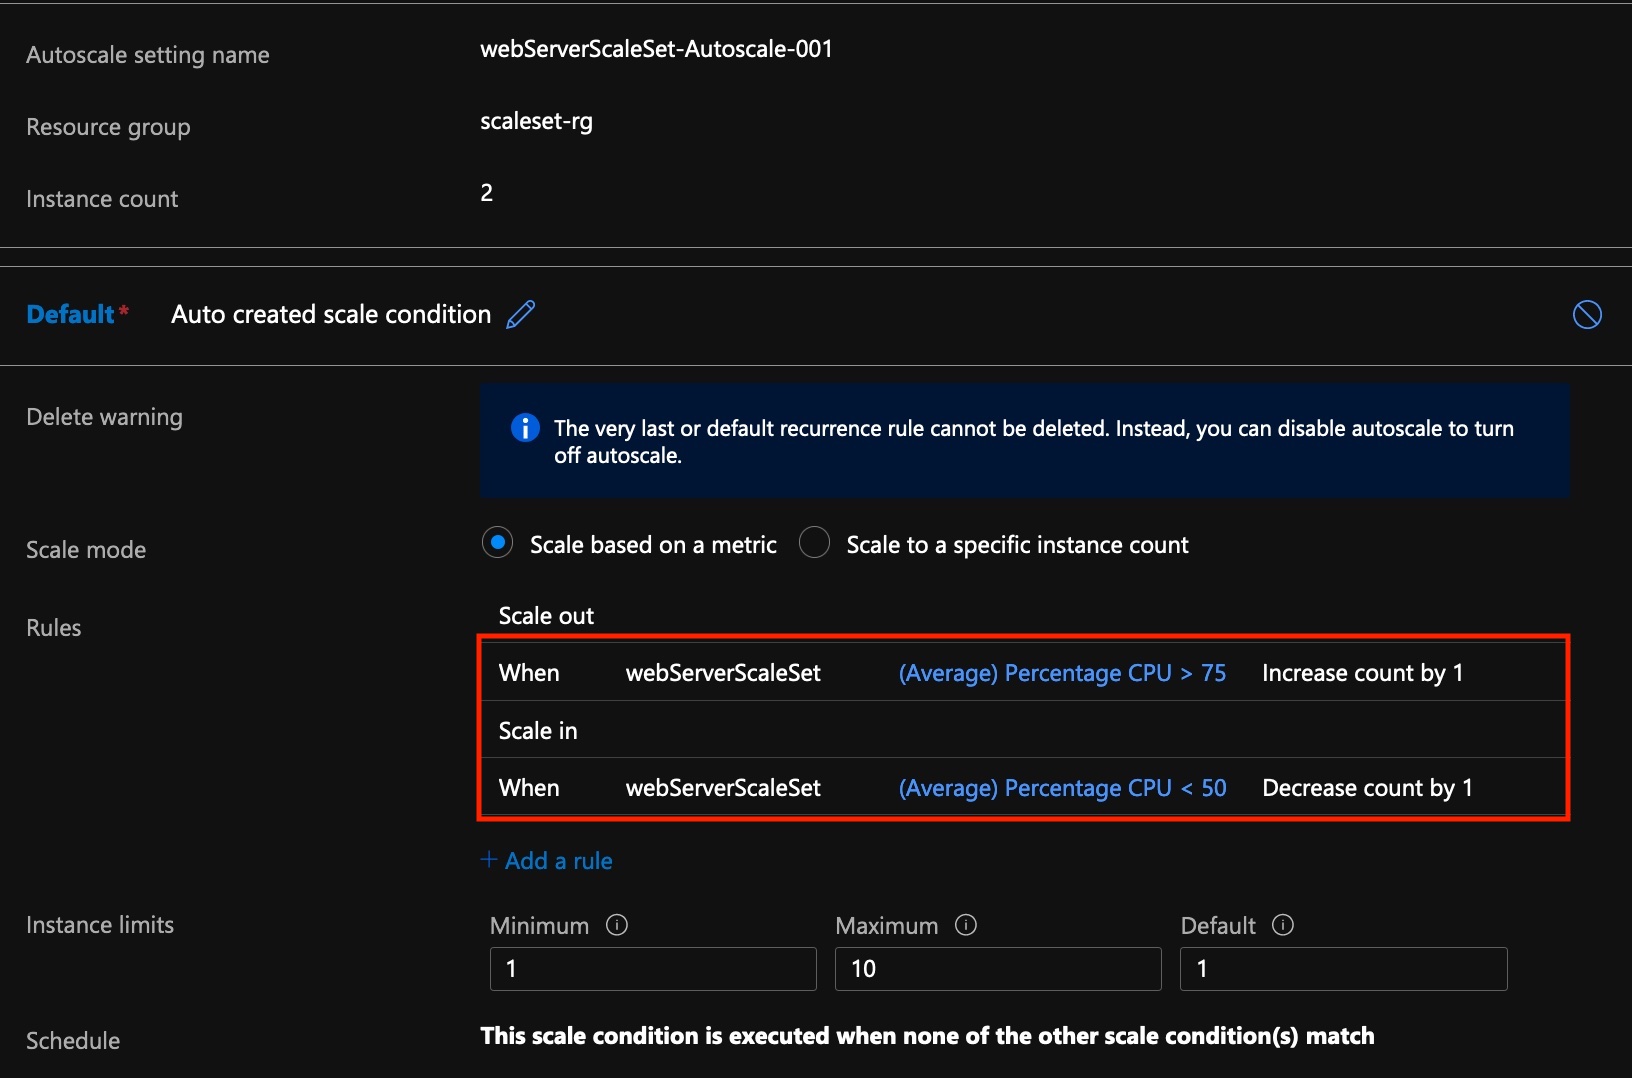
- Verify the rules have saved:
